













Inventory4 min read · Updated
How to organize hardware store inventory with bin locations
A practical system for rack, row and position bin locations in a hardware store: naming, labelling, importing and keeping 30,000 items findable.
 By Hardware Store POS Editorial Team · Published
 Key takeaways
- A bin location is a short code (rack-row-position) that tells anyone where an item lives.
- Name bins by what is painted on the shelving, not by department names.
- Assign bins through your import sheet, one aisle at a time, then label that aisle the same day.
- Sort count sheets by bin so stock counts follow a walking route.
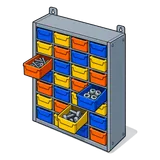
Hardware store inventory organization comes down to one question: can someone who started on Monday find a 10 mm nyloc nut by Tuesday? A bin location makes the answer yes. It is a short code, usually rack · row · position, stored on each item and printed on its shelf label, so the screen, the label and the shelf all say the same thing.
This guide walks through a system we see work in independent hardware stores and supply yards, from naming to labelling to counting.
Why aisles and departments aren’t enough
Departments (“Plumbing”, “Fasteners”) tell you which end of the store to walk to. They don’t tell you which of the 600 bins in the fastener bay holds the M10 × 60 bolts. In a store with 20,000–60,000 SKUs, that last few metres is where the time goes:
- the customer waits at the counter while someone searches;
- the item is “not in stock” on the floor but the system says 40;
- the count comes up short and the item gets re-ordered, again.
Experienced staff carry the map in their heads. Bin locations put it in the system.
Step 1: choose a code your shelving can carry
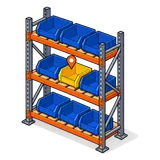
Use what’s physically there. If your gondolas are numbered 1–40, those are racks. Shelves top to bottom are rows (A, B, C…). Positions are the slots or bins left to right.
| Level | Example | Where it’s marked |
|---|---|---|
| Rack | R4 | End-cap sign or upright |
| Row | C | Shelf edge strip |
| Position | 12 | Bin front or shelf label |
Three rules keep it simple:
- Same length everywhere. R04-C-12 sorts better than R4-C-12 once you pass rack 9.
- No meaning in the code. “PLB-03” ages badly when plumbing moves. Numbers don’t.
- Yard gets its own prefix. Y1-A-01 for the yard, so nobody walks the store looking for cement.
Step 2: switch the fields on and decide the depth
In Hardware Store POS, rack, row and position are three separate switches. Small stores often use rack and row only; fastener-heavy stores use all three. Locations are stored per store or yard, so a branch can have its own layout.
Step 3: assign bins through the import, one aisle at a time
Don’t try to bin the whole store in a weekend. Do one aisle per session:
- Export or open your item sheet filtered to that aisle’s categories.
- Walk the aisle with the sheet (or a tablet) and fill the rack, row and position columns.
- Import the sheet; existing items are matched by SKU and updated.
- Print shelf labels for the aisle the same day, with the bin code on them.
- Spot-check ten items: scan, read the bin on screen, walk to it.
The import guide explains the template; the rack · row · position page shows the fields.
Step 4: label so the code is visible from the aisle
A bin code nobody can see doesn’t help. Put it on the shelf label next to the price, large enough to read standing up. For fasteners and small parts, label the bin front too. Use thermal-transfer labels in the yard; direct-thermal fades in sunlight.
Step 5: make counting follow the bins
Stock counts get faster when the count sheet is in walking order. Filter the stock report by location and sort by rack and row: counters walk the aisle once, top to bottom, left to right. Post differences as stock adjustments with a reason (damage, theft, miscount) so you can see patterns later.
A rhythm that works for many stores:
- Monthly: cycle-count the fastest movers and anything high-value.
- Quarterly: one department per quarter in full.
- Yearly: everything, ideally on a closed day.
Common mistakes
- Binning by memory. Walk the aisle; the shelf is the truth, not the old spreadsheet.
- Moving bays without updating codes. When you re-merchandise, re-import the new codes the same week.
- One bin for pick and overflow. Record the pick bin; keep overflow on a marked top shelf or as yard stock.
- Codes that only the owner understands. Test the system on your newest staff member.
What changes once bins are in
New hires answer “where is it?” from the screen. Runners pick quotations by bin order. Counts find real shrinkage instead of misplaced stock. And when you open a second branch, you copy a system, not a person.
Next steps: read selling by the box, the piece and the foot, or see bins working on a demo with your own items.
Questions readers ask
- What is the best bin location format for a hardware store?
- Rack-row-position, such as R4-C-12, painted or tagged on the shelving. It is short enough for a label and specific enough for a new hire.
- How long does it take to assign bins to a whole store?
- Plan on an aisle per evening for a typical store, including labelling. Big-ticket aisles first, fasteners last because they have the most bins.
- Should overflow stock have its own bin?
- Record the pick bin on the item and keep overflow in a clearly marked top shelf or the yard; use a stock transfer if the yard is a separate location.
About the author
Hardware Store POS Editorial Team
The team that documents Hardware Store POS for hardware and building-supply retailers in the USA, the UAE and Pakistan.
- Written from the product's live configuration screens
- Reviewed against the published tax authority sources linked in each article